
DIY Pool Fence Guide: Secure Your Pool Area Safely
DIY Pool Fence Guide: Secure Your Pool Area Safely
DIY pool fencing seems simple when you look at an Aussie backyard, but every year over 3000 backyard pool inspections in Queensland alone uncover safety breaches. Most folks reckon grabbing some panels and digging a few holes will sort it out fast. The real shock is how much hinges on exact measurements, council rules, and tiny details—miss just one and your fence could be illegal or downright unsafe.
Table of Contents
Quick Summary
| Key Point | Explanation |
| 1. Measure Your Pool Area Accurately | Proper measurements lay the groundwork for a compliant and safe fence installation around your pool area. |
| 2. Choose Durable and Compliant Materials | Select materials like aluminium or tempered glass that meet safety standards and suit your environment. |
| 3. Plan Your Fence Layout Carefully | Create a detailed fence layout, noting heights, gates, and any obstacles to ensure safety and compliance. |
| 4. Securely Install Fence Posts | Ensure posts are properly aligned and set deep enough in concrete to provide a robust foundation for your fence. |
| 5. Conduct a Thorough Safety Inspection | Regularly check your fence for compliance with safety standards, ensuring it remains a reliable barrier for your pool area. |
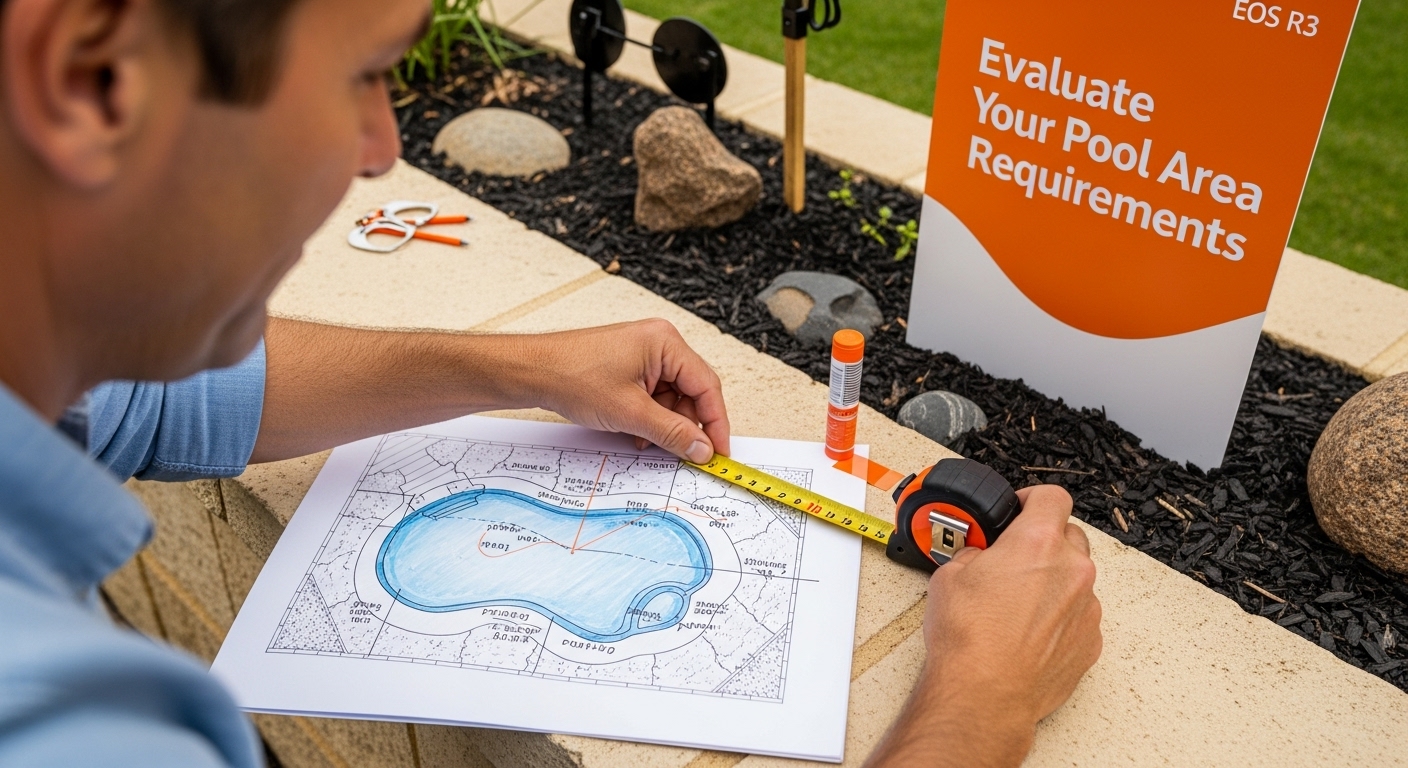
Step 1: Evaluate Your Pool Area Requirements
Before diving into your DIY pool fence project, understanding your specific pool area requirements is crucial. This initial assessment sets the foundation for a safe, compliant, and effective pool barrier that protects your loved ones and meets Australian safety standards.
Start by carefully measuring your pool’s perimeter and surrounding landscape. Accurate measurements are critical for determining the right fence length, height, and configuration. Take a detailed walkthrough of your pool area, noting any unique features like uneven terrain, existing structures, garden beds, or potential obstacles that might impact fence installation.
Australian pool safety regulations are stringent, and for good reason. According to the Queensland Government’s pool safety guidelines, pool barriers must meet specific technical requirements:
-
Minimum fence height of 1.2 meters
-
Maximum ground gap of 100mm
-
Self-closing and self-latching gates
-
No climbable objects within 900mm of the barrier
Consider the specific configuration of your pool area. Rectangular pools offer straightforward fencing solutions, while irregularly shaped or multi-level pool environments might require more complex barrier designs. Pay close attention to potential weak points where a child could potentially access the pool area.
Before purchasing materials, document your measurements and take detailed photographs of the pool area. These will be invaluable when consulting with local authorities or purchasing fencing supplies. Some local councils might require specific approvals or have additional regulations beyond standard state guidelines, so checking with your municipal office is recommended.
Finally, assess the surrounding environment. Do you have trees, garden structures, or other features near the pool that might interfere with fence installation? Understanding these nuances will help you plan a more effective and compliant pool fence that integrates seamlessly with your outdoor space.
Step 2: Select Suitable Materials for Your Fence
Selecting the right materials for your pool fence is a critical decision that impacts both safety and aesthetics. Each material offers unique advantages and challenges, so understanding your options will help you make an informed choice that meets Australian safety standards and complements your outdoor space.
Aluminium emerges as a top choice for many Australian homeowners due to its durability, lightweight nature, and resistance to corrosion. These fences withstand harsh coastal environments and require minimal maintenance. Unlike timber, aluminium won’t rot, warp, or need regular painting. Modern aluminium pool fences come in various powder-coated finishes that can seamlessly match your existing outdoor design.
According to the Queensland Building and Construction Commission, pool fencing materials must meet specific structural integrity requirements. Glass panels, another popular option, must be made of reinforced safety glass and installed to prevent potential fractures. Tempered glass panels offer a sleek, modern look that provides unobstructed views of your pool area while maintaining robust safety standards.
When evaluating materials, consider factors beyond initial cost. Timber might seem economical initially but requires frequent maintenance and treatment against weathering. Steel offers strength but can be prone to rust in coastal regions. Aluminium and glass provide a balance of durability, aesthetics, and long-term value.
Consider your specific environment when making your selection. Homes near saltwater or with high humidity might benefit from marine-grade aluminium or corrosion-resistant materials. Homes in bushfire-prone areas should select materials with appropriate fire-resistance ratings.
Here is a comparison of popular pool fencing materials highlighting their main features and considerations to help you choose the right option for your installation.
| Material | Durability | Maintenance | Aesthetic Appeal | Suitability for Environment |
| Aluminium | Highly resistant to corrosion | Low | Modern powder-coated | Excellent for coastal/high-humidity |
| Tempered Glass | Strong, shatter-resistant | Low | Sleek, unobstructed view | Suits modern, open designs |
| Timber | Prone to weathering/rot | High | Classic, natural | Needs treatment for outdoor use |
| Steel | Very strong, may rust | Moderate | Traditional, robust | Better for dry areas, needs coating |
Your material choice should also align with local council regulations. Some areas have specific requirements about fence materials, transparency, and installation methods. Always check with your local municipal office to ensure full compliance before purchasing materials.
Verify your material selection by confirming it meets these key criteria:
-
Complies with Australian pool safety standards
-
Provides minimum 1.2-meter height requirement
-
Offers durability in your specific environmental conditions
-
Matches your aesthetic preferences
-
Falls within your budget for both initial purchase and long-term maintenance
Step 3: Measure and Plan Your Fence Layout
Measuring and planning your pool fence layout is a precise process that demands attention to detail and careful preparation. This critical step ensures your fence meets Australian safety standards while fitting seamlessly into your outdoor environment.
Begin by creating a detailed sketch of your pool area, capturing every nuance of the landscape. Use a quality measuring tape and record precise measurements of your pool’s perimeter, including any unique architectural features or potential obstacles. Sketch out the proposed fence line, noting exactly where gates will be positioned and considering how the fence will integrate with existing structures like decks, garden walls, or property boundaries.
According to the South Australian Government’s pool safety guidelines, your pool barrier must be a continuous, uninterrupted safety system. This means carefully planning how each fence section will connect, ensuring there are no gaps or weak points that could compromise safety.
Pay special attention to terrain variations. Sloped or uneven ground requires strategic planning to maintain the mandatory 1.2-meter fence height at all points. Some sections might need stepped or angled installations to accommodate natural landscape contours. Take multiple ground-level measurements to understand the terrain’s complexity.
Consider the placement of your gate with strategic precision. Gates must swing outward from the pool area and include self-closing and self-latching mechanisms. Measure the gate width carefully, typically ranging between 1 to 1.2 meters, to ensure smooth functionality and compliance with safety regulations.
Document your measurements meticulously. Create a comprehensive diagram that includes:
-
Exact fence line measurements
-
Ground level variations
-
Gate placement and swing direction
-
Distance from pool edge
-
Potential mounting points for fence posts
Before finalizing your plan, conduct a physical walkthrough. Visualize how people will move around the fence, checking for potential access points or areas that might require additional reinforcement. This practical assessment can reveal planning nuances that measurements alone might miss.
Verify your layout by cross-checking measurements, confirming compliance with local safety regulations, and ensuring the fence design provides comprehensive pool area protection. A well-planned layout is your first line of defense in creating a safe swimming environment.
Step 4: Install the Fence Posts Securely
Installing fence posts is the structural backbone of your pool safety barrier. This critical step demands precision, patience, and a methodical approach to ensure your fence meets Australian safety standards and provides robust protection.
Begin by marking your post locations using the detailed measurements from your previous layout planning. Accuracy is paramount - even a few centimetres can compromise your fence’s integrity. Use bright marking paint or stakes to clearly indicate each post’s exact position, double-checking alignment and spacing.
According to the Queensland Building and Construction Commission, pool fences must be built on stable and solid ground. This means preparing your post holes with exceptional care. For most residential pools, dig holes approximately 500mm deep and 300mm in diameter. The depth ensures stability, especially in areas with softer soil or challenging terrain.
Choose your post material wisely. Stainless steel spigots or aluminium posts offer superior durability and resistance to corrosion, particularly in harsh Australian outdoor environments. If using timber, ensure it’s treated for outdoor conditions and resistant to moisture and pest damage.
Posts must be set in concrete for maximum stability. Mix the concrete to a thick, pudding-like consistency and carefully pour around each post, using a spirit level to ensure perfect vertical alignment. Pro tips: Create a slight slope in the concrete around the post base to help water drain away, preventing potential moisture-related damage. Do not use rapid setting concrete on steel or aluminium fence posts as it is corrosive.
Consider these essential verification points for post installation:
-
Posts are perfectly vertical
-
Spacing matches your original measurements
-
Concrete is fully settled and hardened
-
No wobbling or movement when tested
-
Minimum depth of 500mm achieved
Allow the concrete to cure completely before attaching fence panels or rails. This typically takes 24-48 hours, depending on weather conditions. During this time, avoid disturbing the posts or applying any lateral pressure.
Remember that post installation isn’t just about physical placement. It’s about creating a robust, reliable foundation for a safety barrier that will protect your loved ones. Take your time, be meticulous, and don’t rush the process.
Step 5: Attach the Fencing Panels Properly
Attaching fencing panels is a precision task that transforms your carefully prepared posts into a robust safety barrier. This step requires meticulous attention to detail and a systematic approach to ensure your pool fence meets Australian safety standards.
Begin by laying out your panels near their designated posts, checking each panel’s alignment and integrity before installation. Measure twice, attach once is the golden rule. Aluminium and glass panels require especially careful handling to prevent damage or misalignment during the attachment process.
According to the Queensland Government’s pool safety regulations, your fence must create a continuous, uninterrupted barrier. This means each panel must be securely fastened with minimal gaps, preventing any potential entry points for children.
Use high-quality stainless steel mounting brackets designed specifically for pool fencing. These brackets should allow for minor adjustments to ensure perfect vertical alignment. When attaching panels, maintain a consistent height and ensure there are no gaps exceeding 100 millimetres between the ground and the bottom of the fence.

For glass panel installations, use robust clamps or spigots that provide secure mounting without compromising the panel’s structural integrity. Aluminium panel attachments typically involve sliding the panel into pre-installed channels or using specialised mounting hardware that allows for precise positioning.
Verify your panel installation by checking these critical points:
-
No horizontal gaps between panels
-
Consistent height across entire fence line
-
Panels are perfectly vertical
-
Mounting hardware is tight and secure
-
No wobbling or movement when gently tested
Pay special attention to corners and transitions between different fence sections. These areas often present the most challenging alignment issues. Use a spirit level frequently to ensure each panel remains perfectly straight and true.
Remember that panel attachment is more than a mechanical process it’s about creating a reliable safety barrier. Take your time, be patient, and prioritize precision over speed. Your careful work will directly contribute to protecting your loved ones and meeting critical safety standards.
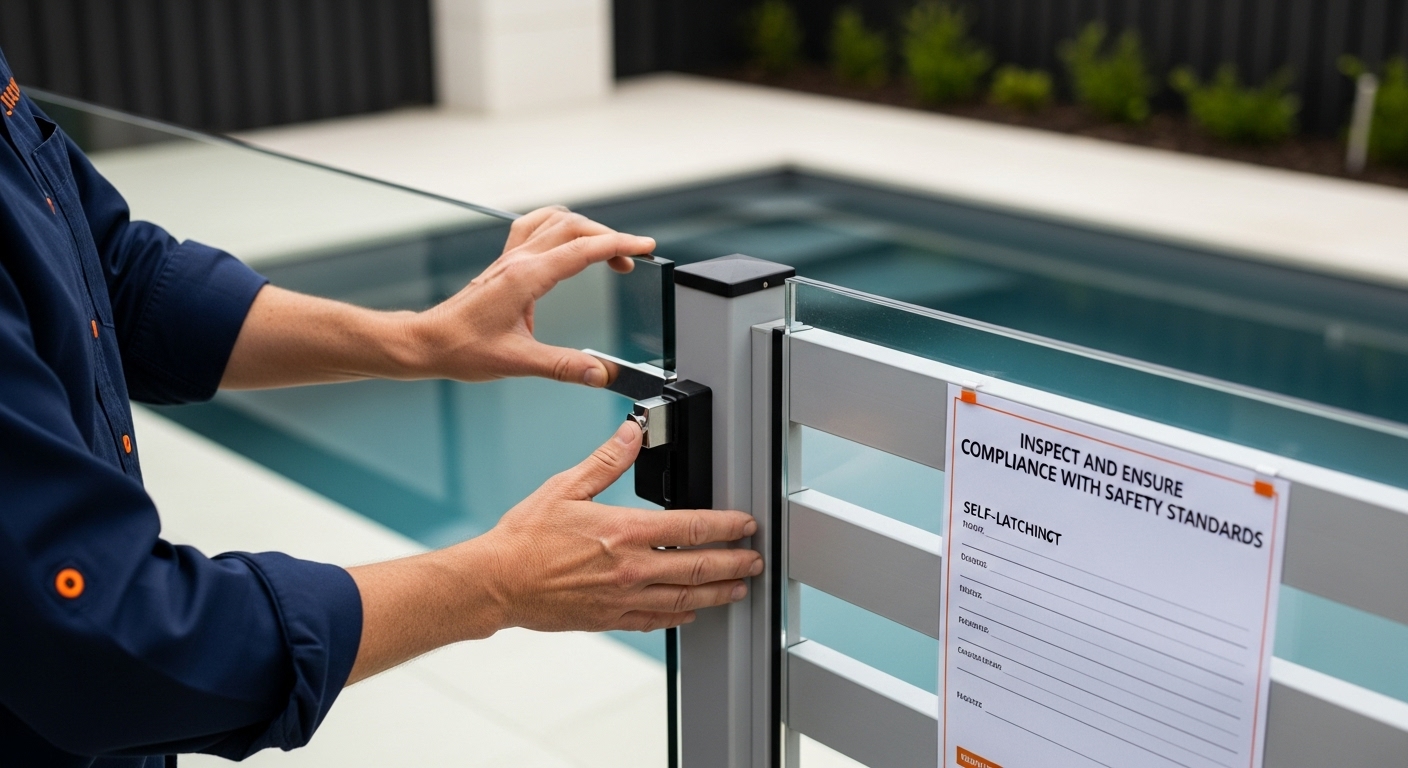
Step 6: Inspect and Ensure Compliance with Safety Standards
Inspecting and ensuring compliance with safety standards is the final and most critical step in your DIY pool fence project. This comprehensive review transforms your hard work into a genuine safety barrier that protects your loved ones and meets stringent Australian regulations.
Begin with a systematic visual inspection of your entire fence installation. Walk the entire perimeter, examining each section meticulously. Look for any subtle imperfections that might compromise the fence’s integrity. Check that the fence maintains a consistent 1.2-meter height, with no gaps larger than 100 millimetres between the ground and the bottom of the fence panels.
According to the Queensland Building and Construction Commission, your pool fence must be rigid, strong, and completely secure. Pay special attention to the gate mechanism. Test the self-closing and self-latching features multiple times, ensuring the gate swings closed automatically from any open position and latches securely without manual intervention.
Conduct a comprehensive physical assessment by applying gentle pressure to various fence sections. The barrier should feel solid and immovable, with no wobbling or flexibility that could indicate improper installation. Examine all mounting points, checking that brackets and fasteners remain tight and corrosion-free.
Verify your compliance by checking these critical safety elements:
The following table provides a quick compliance checklist you can use to verify that your DIY pool fence meets essential Australian safety standards before your final inspection.
| Compliance Element | Minimum Requirement | How to Check |
| Fence Height | 1.2 metres | Measure all points around fence |
| Gap Under Fence | Less than 100mm | Use tape measure at base |
| Gate Operation | Self-closing, self-latching | Test from all open positions |
| Gaps Between Panels | No horizontal gaps | Visually inspect between panels |
| Objects Near Fence | No climbable items within 900mm | Inspect surrounding area |
| Structural Soundness | Rigid, not wobbly | Apply light pressure, check fixings |
-
Fence height consistently 1.2 meters
-
No horizontal gaps between panels
-
Gate self-closes from all positions
-
Latch mechanism operates smoothly
-
No climbable objects near the fence
-
Ground-to-fence gap under 100 millimetres
Consider enlisting a professional pool safety inspector for a final certification. While not mandatory for DIY installations, their expert eye can identify subtle issues you might have overlooked. Many local councils offer inspection services or can recommend qualified professionals.
Remember that pool fence safety is an ongoing commitment. Plan to conduct thorough inspections every six months, checking for any signs of wear, damage, or potential weakness. Your diligence ensures the fence remains a reliable protective barrier, giving you peace of mind and keeping your loved ones safe.
Upgrade Your DIY Pool Fence Project with Trusted Supplies from Fence Guru
Struggling to find high-quality, compliant materials for your DIY pool fence? Many homeowners get stuck when it comes to sourcing durable panels and fittings that meet strict Australian pool safety standards. Your safety checklist is clear: accurate measurements, certified materials, and flawless installation are all key. But unless you use professional-grade supplies, even the most carefully planned DIY project can fall short on both safety and style.
Why risk it when you can access the same premium fencing solutions trusted by the pros? Fence Guru makes it easy for you to secure your pool area safely and affordably. With one of Australia’s largest ranges of aluminium and glass pool fencing, expert advice, and 24 convenient pickup locations, we help you avoid delays and costly mistakes. Shop aluminium or glass pool fencing supplies in-stock and ready for fast pickup or delivery. Take the next step towards a beautiful, compliant pool fence—explore our full range at www.fenceguru.com.au or reach out for personalised advice now.
Frequently Asked Questions
What are the essential safety standards for a DIY pool fence?
To ensure safety, your DIY pool fence must meet specific standards, including a minimum height of 1.2 meters, a maximum ground gap of 100mm, and must include self-closing and self-latching gates. Additionally, there should be no climbable objects within 900mm of the barrier.
How do I choose the right materials for my pool fence?
When selecting materials for your pool fence, consider durability, maintenance, and aesthetics. Options include aluminium, which is resistant to corrosion, and tempered glass for unobstructed views. It’s important to ensure the materials comply with local safety regulations and are suited for your environment.
What should I consider when planning the pool fence layout?
When planning your pool fence layout, create a detailed diagram capturing the pool area, including any unique landscape features and obstacles. Ensure that the fence is a continuous barrier with no gaps, and strategically place gates that swing outward from the pool area.
How can I ensure my gate operates correctly after installation?
To ensure your gate operates correctly, it must have self-closing and self-latching mechanisms. Test the gate multiple times to confirm it swings closed from any position and latches securely without assistance. Also, check that no obstacles prevent the gate from functioning properly.
Recent Posts
-
Searching for Vineyard Posts? Why Your Front Entrance Needs Premium PVC Post and Rail.
When you are setting up a new block or upgrading an established property, searching for the right vi …18th May 2026 -
Thinking of Buying a Timber Post and Rail Fence and Painting it White? Why PVC is the Perfect Choice.
That classic, crisp look of a white post and rail fence is hard to beat. It instantly gives a proper …18th May 2026 -

7 Smart Pool Fencing Options List for Aussie Homes
7 Smart Pool Fencing Options List for Aussie Homes Did you know that almost 70 percent of Australia …31st Oct 2025

